Drawing foxes can be a delightful experience. These creatures are full of charm and character. Their unique features make them interesting subjects for artists. Whether you’re a beginner or an experienced artist, foxes offer a fun challenge. This guide will help you unlock the magic of drawing foxes. We’ll cover everything from basic techniques to advanced tips. Get ready to bring these playful creatures to life on paper!
Ready to bring the enchanting world of foxes to life on paper? Discover the secrets of capturing their playful spirit and clever charm. From fluffy tails to sly grins, learn how to draw these magical creatures step by step. No artistic experience? No problem! This guide makes fox drawing fun and easy for everyone.
Drawing a fox can be fun and easy. Start with basic shapes like circles and triangles. Add pointed ears and a fluffy tail. Use orange and white colors for the fur. Don’t forget the black nose and paws. Practice sketching the fox in different poses. Add details like whiskers and fur texture. Remember, foxes have keen eyes, so make them bright.
1. Getting Started with Drawing:1enzi6g2cvg= Fox: The Basics
Starting with the basics is crucial in fox drawing. Begin by observing the overall shape of a fox. Notice their pointed ears and bushy tail. Sketch these basic shapes lightly on your paper. Use simple geometric forms like circles and triangles. These will serve as the foundation for your fox drawing. Don’t worry about details at this stage.
Focus on getting the proportions right. Remember, the body is usually longer than it is tall. The head is relatively small compared to the body. Practice these basic shapes until you feel comfortable. This will make the next steps much easier.
2. Essential Supplies for Drawing:1enzi6g2cvg= Fox
Having the right supplies can make a big difference in your fox drawing. Start with good quality drawing paper. Choose paper that can handle erasing without tearing. Pencils are your main tool. Get a set with varying hardness levels. Soft pencils (like 2B or 4B) are great for shading. Harder pencils (like HB or H) work well for fine details.
Don’t forget erasers. A kneaded eraser is perfect for lifting light marks. A regular eraser helps with more stubborn lines. A sharpener keeps your pencils ready for action. If you plan to add color, consider colored pencils or watercolors. These can bring your fox to life with vibrant hues. A ruler can help with straight lines if needed. Lastly, a sketchbook is great for practice and quick sketches.
3. Step-by-Step Guide to Drawing:1enzi6g2cvg= Fox
Let’s break down the process of drawing a fox step by step. Start with a circle for the head. Add a smaller circle for the snout. Draw two triangles on top for ears. Sketch an oval for the body. Add four stick-like legs. Draw a long, bushy tail. Now, refine these shapes. Give the head more definition. Add eyes, nose, and mouth.
Shape the body to be more fox-like. Add fur texture around the neck and chest. Define the legs and paws. Make the tail fluffy and curved. Add details to the face. Draw whiskers and fur patterns. Erase unnecessary guidelines.
Refine your lines to make them cleaner. Add shading to give depth. Start with light shading and build up gradually. Pay attention to the direction of fur growth. Add highlights to the eyes for a lively look. Finally, add any background elements if desired.
4. Tips for Making Your Drawing:1enzi6g2cvg= Fox Look Lifelike
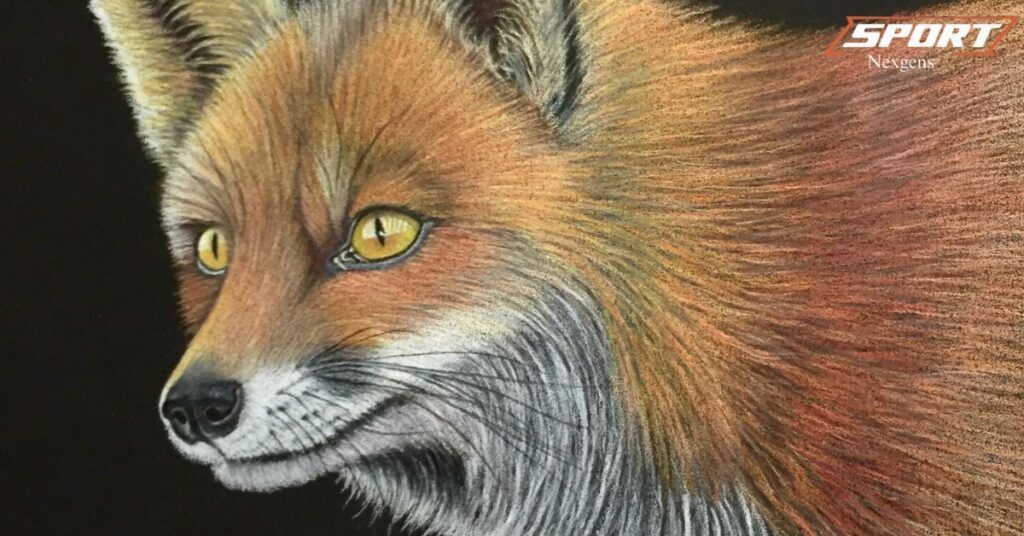
Creating a lifelike fox drawing requires attention to detail. Focus on the eyes. They should be alert and expressive. Drawing:1enzi6g2cvg= Fox Make sure the proportions are correct. A fox’s legs are relatively short compared to its body. The tail should be bushy and about two-thirds the length of the body. Pay attention to the fur texture.
Foxes have different fur lengths on different parts of their body. Use reference photos to get these details right. Observe how light falls on a fox’s fur. This will help with shading. Add small details like whiskers and individual fur strands. These can make your drawing more realistic. Don’t forget the paws. They should look soft yet capable.
The ears should be alert and pointed. Remember, foxes have a slender, agile build. Avoid making them look too bulky. Use subtle color variations if you’re adding color. Real foxes aren’t just one solid color.
5. How to Add Color to Your Drawing:1enzi6g2cvg= Fox
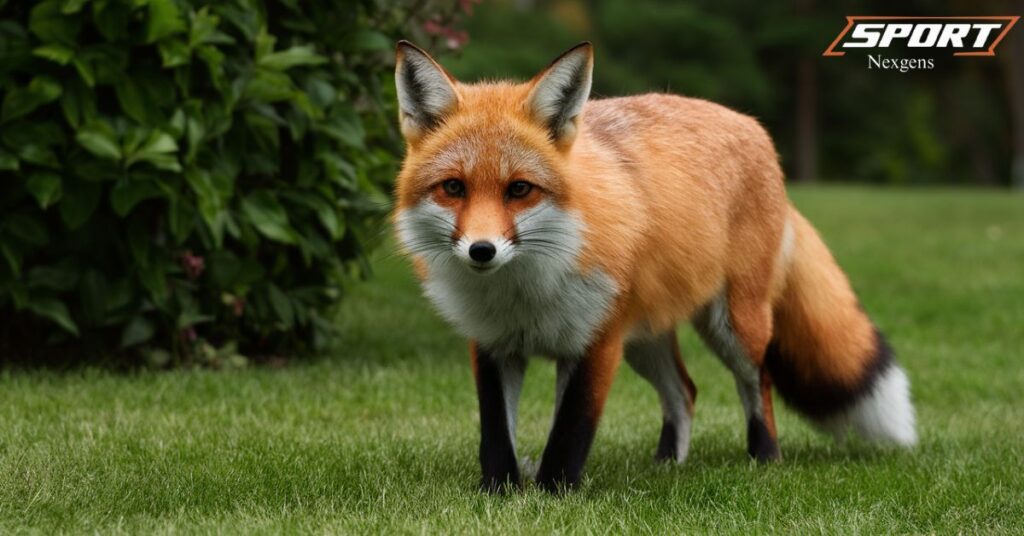
Adding color can bring your fox drawing to life. Start with a light base color. For red foxes, use a soft orange or rust color. Apply this evenly across the body. Next, add darker shades for depth. Use browns and deeper oranges. Focus on areas that would be in shadow. The back and sides of the legs often have darker fur.
Add white for the chest, belly, and tip of the tail. Use a very light touch for highlights. Black or dark brown works well for the paws and ear tips. For the eyes, start with a yellow or amber base. Add darker flecks for realism. Use green or blue for the iris if you prefer. Blend colors gently for a natural look. Colored pencils work well for fur texture.
Layer different shades for a rich effect. If using watercolors, start with light washes. Build up color gradually. Don’t forget the surroundings. A bit of green for grass or blue for sky can enhance your fox.
Read This Blog: Transform Your Digital World with Wallpaper:y0nv0sjhznu= Naruto
6. Fun Techniques for Shading Your Drawing:1enzi6g2cvg= Fox
Shading adds depth and dimension to your fox drawing. Start with basic pencil shading. Use the side of your pencil for broad strokes. Press lightly for highlights and harder for shadows. Try cross-hatching for a textured look. This involves drawing intersecting lines. It works well for depicting fur. Stippling is another fun technique.
Use tiny dots to create shading. This can be time-consuming but gives a unique effect. For smooth shading, try blending with a tissue or blending stump. This softens pencil marks nicely. Experiment with different pencil hardness. Softer pencils give darker, smoother shades. Harder pencils are great for fine details. Don’t forget about negative space.
The areas you leave light are just as important as the shaded parts. Use an eraser to create highlights. This can add a sparkle to the eyes or shine to the fur. Practice these techniques separately before applying them to your fox.
7. Creating Texture: How to Draw Realistic Fur on Your Fox
Drawing realistic fur is key to a great fox illustration. Start by observing real fox fur. Notice how it grows in different directions. Use short, quick strokes to mimic fur texture. Vary the pressure of your pencil. This creates depth in the fur. Draw fur in layers. Start with a base layer of light strokes. Add darker strokes on top for shadows.
Use a kneaded eraser to create highlights in the fur. Pay attention to the direction of fur growth. It changes across different parts of the body. The face has shorter, finer fur. The body and tail have longer, fluffier fur. Use curved lines to show the contours of the body.
This helps the fur look natural. Don’t draw every single hair. Suggest texture instead. Group your strokes to create the illusion of fur clumps. Use lighter strokes for softer areas like the belly. Darker, more defined strokes work well for the tail. Remember, fur isn’t uniform. Add some irregularities for a natural look.
8. Drawing:1enzi6g2cvg= Fox Expressions: Capture Their Emotions
Foxes are expressive animals. Capturing their emotions can bring your drawing to life. Start with the eyes. Wide eyes show alertness or surprise. Narrowed eyes can indicate suspicion or sleepiness. The position of the ears is important. Erect ears show attentiveness. Flattened ears might indicate fear or aggression.
The mouth can convey a lot. A slightly open mouth with visible teeth can show a playful expression. A closed mouth might indicate calmness. Pay attention to the overall posture. A crouched position might show the fox is ready to pounce. A relaxed stance indicates the fox is at ease. The tail position is also expressive.
An upright, bushy tail often shows excitement. A lowered tail might indicate caution or submission. Don’t forget about the whiskers. They can add to the overall expression. Raised whiskers often accompany an alert expression. Experiment with different combinations of these features. This will help you create a range of fox expressions.
9. Using References for Drawing:1enzi6g2cvg= Fox
Using references is crucial for accurate fox drawings. Start by collecting photos of foxes. Look for images from different angles. Pay attention to the fox’s anatomy in these photos. Notice how light falls on the fur. Observe the proportions of the head, body, and limbs. Look at close-up photos of fox faces. This helps with drawing detailed expressions.
Study photos of foxes in motion. This can help you draw more dynamic poses. Don’t just copy photos directly. Use them as a guide for understanding fox anatomy. Combine elements from different references. This helps create unique drawings. Watch videos of foxes moving. This gives you a better understanding of their behavior. Visit a zoo or wildlife park if possible.
Observing real foxes is invaluable. Sketch from your references regularly. This improves your understanding of fox anatomy. Keep a collection of reference images for future use. Remember, references are tools to improve your drawings, not to copy exactly.
Read This Blog: Meet the Banana:b4hnuk08dew= Monkey: A Colorful and Clever Primate
10. Exploring Different Styles in Drawing:1enzi6g2cvg= Fox
There are many styles you can use for fox drawings. Realistic style focuses on accurate details and proportions. Cartoon style allows for exaggeration and simplification. Try a minimalist approach with just a few lines. Experiment with geometric shapes for a modern look. Watercolor style can create soft, dreamy fox illustrations.
Use bold lines and flat colors for a comic book style. Try a Japanese-inspired sumi-e style for elegant simplicity. Explore abstract interpretations of foxes. Mix different styles for a unique approach. Digital art opens up even more stylistic possibilities. Try pixel art for a retro gaming feel. Experiment with different brush styles in digital programs.
Use textures and patterns for a decorative style. Create a stylized vector illustration. Try a loose, sketchy style for a more dynamic feel. Each style has its own challenges and rewards. Don’t be afraid to develop your own unique style over time.
11. Common Mistakes in Drawing:1enzi6g2cvg= Fox and How to Fix Them
Many beginners make common mistakes when drawing foxes. One is making the body too short. Fix this by extending the body length. Another mistake is drawing the legs too long. Shorten them to match real fox proportions. Some artists make the tail too thin. Remember, fox tails are very bushy. Drawing the ears too small is another common error.
Make them larger and more pointed. Forgetting to add fur texture can make your fox look flat. Add fur strokes to create depth. Some people draw their eyes too large. Keep them in proportion with the head. Making the snout too long is another mistake. Keep it relatively short and pointed. Neglecting to add shading can make your fox look two-dimensional.
Add shadows and highlights for depth. Drawing stiff, straight lines can make your fox look unnatural. Use curved lines for a more organic feel. Overworking the drawing is a common pitfall. Know when to stop adding details. Practice regularly to avoid these mistakes in the future.
12. Why Drawing:1enzi6g2cvg= Fox is Great for Your Creativity and Relaxation
Drawing foxes can boost your creativity in many ways. It encourages you to observe nature closely. This improves your overall drawing skills. Foxes have complex shapes, challenging you to improve. Their expressive faces help you practice capturing emotions. Drawing foxes can inspire stories and characters.
It’s a great subject for experimenting with different art styles. Fox drawing can be very relaxing. It allows you to focus and forget daily stresses. The repetitive motion of drawing fur can be meditative. Completing a fox drawing gives a sense of accomplishment. It’s a way to express yourself without words. Drawing foxes connects you with nature, even from indoors. It can be a fun activity to share with others.
Children often enjoy drawing foxes, making it a family activity. Improving your fox drawings over time is rewarding. It’s a skill you can continually develop and refine. Fox drawing can lead to interest in other wildlife art. It’s a versatile subject that never gets boring.
FAQs
What’s the best way to start drawing a fox for beginners?
Start with basic shapes like circles and ovals. Build the fox’s form gradually.
How can I make my fox’s fur look more realistic?
Use short, overlapping strokes in the direction of fur growth. Vary pressure for depth.
What colors should I use for a realistic fox drawing?
Use shades of orange, red, and brown. Add white for the belly and black for paws and ears.
How do I draw a fox’s face accurately?
Focus on the triangular shape. Pay attention to the placement of eyes, nose, and mouth.
What’s the secret to drawing expressive fox eyes?
Make them almond-shaped. Add a highlight and vary the pupil size for different expressions.
Conclusion
Drawing foxes is a rewarding and enjoyable artistic pursuit. It offers endless opportunities for creativity and skill development. From basic sketches to detailed illustrations, fox drawing can suit artists of all levels. Remember, the key to improvement is practice and patience. Don’t be discouraged if your first attempts aren’t perfect.
Each drawing will teach you something new. Experiment with different techniques and styles to find what works best for you. Use references to improve your understanding of fox anatomy. Most importantly, have fun with your fox drawings. Let your creativity run wild and enjoy the process of bringing these charming creatures to life on paper.

Our celebrity-focused website offers readers an insider’s view into the glamorous world of stars. We deliver breaking news, exclusive interviews, and behind-the-scenes gossip. From red carpet events to personal milestones, we cover it all. Join us for daily updates on your favorite celebrities’ lives, careers, and controversies.